Unlock Innovation: Prototyping Low-Fidelity MVPs – Essential Tools & Best Practices for Beginners
Got a brilliant app idea or a revolutionary new product concept? That initial spark is exciting, but turning it into a tangible, testable reality can feel overwhelming. Many aspiring innovators jump straight into building a polished product, only to realize later that they’ve spent months and thousands of dollars on something users don’t actually want.
This is where low-fidelity prototyping comes to the rescue, especially when combined with the concept of a Minimum Viable Product (MVP). It’s your secret weapon for validating ideas quickly, affordably, and with minimal risk.
In this comprehensive guide, we’ll dive deep into what low-fidelity MVP prototyping is, why it’s a game-changer for beginners, the best tools to get started, and crucial best practices to ensure your success.
What is Low-Fidelity Prototyping? (And Why It’s Perfect for MVPs)
Imagine you’re an architect designing a new building. Would you immediately start laying bricks and pouring concrete? Of course not! You’d first sketch out floor plans, draw rough elevations, and maybe even build a simple cardboard model. These are your "low-fidelity" prototypes.
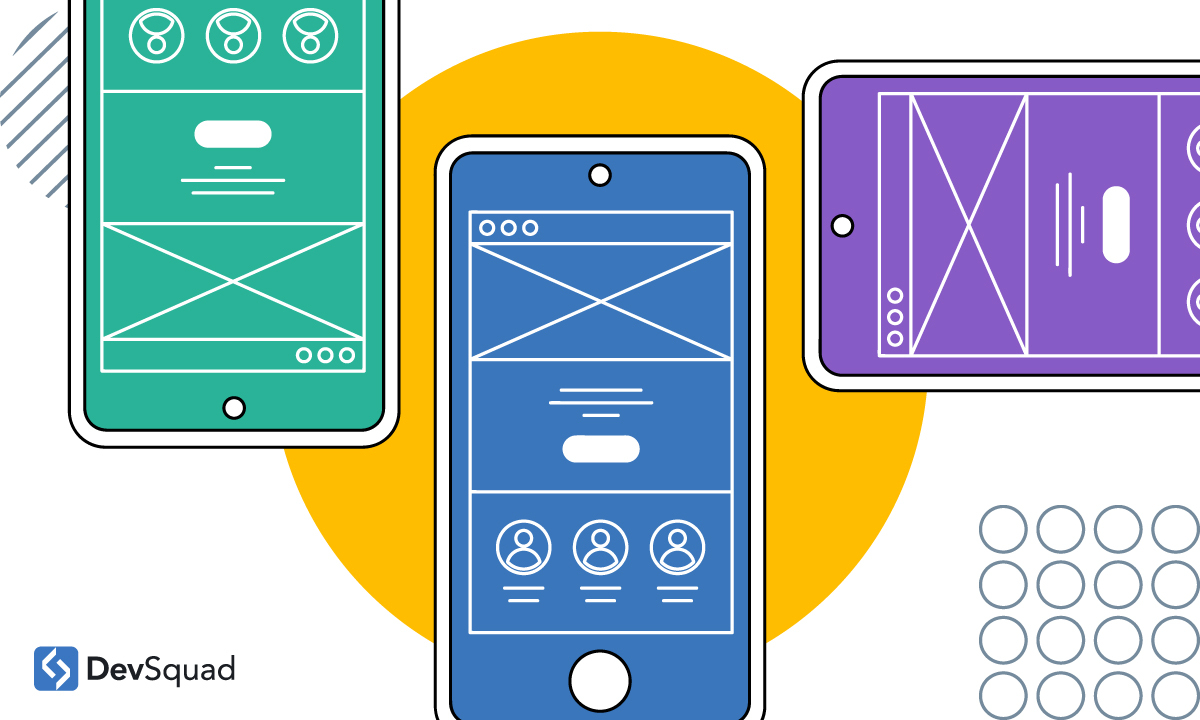
In the world of digital products and services, low-fidelity (low-fi) prototyping refers to creating basic, simplified versions of your product idea. Think of them as the blueprints or stick-figure drawings of your app or website. They lack visual polish, detailed graphics, and often don’t have full functionality.
Key characteristics of low-fidelity prototypes:
- Simple & Sketchy: Often hand-drawn, basic shapes, grayscale, or black and white.
- Focus on Function: Prioritizes how the user moves through the product (the "flow") and what core problems it solves, rather than how pretty it looks.
- Quick to Create: Can be made in minutes or hours, not days or weeks.
- Easy to Change: Because they’re so simple, feedback can be incorporated rapidly without much effort.
Now, let’s connect this to an MVP (Minimum Viable Product). An MVP is the bare-bones version of your product that has just enough features to be usable by early customers and gather feedback for future development. It’s about testing your core assumption with real users as quickly as possible.
Why low-fi prototyping is perfect for MVPs:
You use low-fi prototypes to design and test your MVP before you even write a single line of code or invest heavily in high-fidelity design. It allows you to visualize your MVP’s core functionality and user journey, test it with potential users, and iterate based on their feedback, all before significant investment. It’s the ultimate lean startup approach!
Why Prototype Low-Fi MVPs? The Unbeatable Benefits
If you’re still wondering why you should spend time on "rough sketches" instead of diving into "real" design, consider these powerful advantages:
-
1. Cost-Effective Validation:
- Save Money: Avoid wasting resources building features no one wants. A low-fi prototype costs virtually nothing compared to developing even a basic app.
- Save Time: Create and test ideas in hours or days, not weeks or months. This rapid iteration cycle means you can test more ideas faster.
-
2. Rapid Iteration and Flexibility:
- It’s incredibly easy to make changes. Got new feedback? Just erase and redraw, or drag and drop a different shape. This encourages experimentation and quick adjustments to your design.
- You can test multiple versions of a feature or user flow without significant rework.
-
3. Early User Feedback is Gold:
- Low-fi prototypes encourage users to focus on the functionality and usability, not the aesthetics. They’re more likely to give honest, critical feedback on whether the product solves their problem or if the flow is confusing.
- Catch critical usability issues or design flaws when they’re cheap and easy to fix, not when they’re deeply embedded in code.
-
4. Reduces Risk & Builds Confidence:
- Validate your core assumptions about user needs and product viability before committing significant resources.
- Helps you understand if there’s a genuine market for your idea, reducing the risk of failure.
- Gives you confidence in your direction, especially if you’re seeking investors or co-founders.
-
5. Fosters Collaboration & Shared Understanding:
- Low-fi prototypes are simple enough for anyone to understand, regardless of their technical background.
- Great for getting everyone on the same page – designers, developers, product managers, stakeholders, and even potential customers.
- They act as a visual communication tool, making abstract ideas concrete.
-
6. Focus on Core Value & User Flow:
- By stripping away visual distractions, low-fi forces you to concentrate on the essential user journey and the core problem your MVP is trying to solve.
- Helps you define your MVP’s scope clearly, preventing "feature creep."
Essential Tools for Low-Fidelity MVP Prototyping
You don’t need expensive software to start prototyping. In fact, some of the best tools are the simplest! Let’s explore a range of options, from the most basic to slightly more advanced digital tools that still excel at low-fi.
A. Physical & Analog Tools (The Simplest Start)
-
Paper and Pen/Pencil:
- How it’s used: Draw screens, buttons, text fields, and user flows on paper. Use sticky notes for interactive elements or different states.
- Why it’s great for low-fi: Zero cost, incredibly fast, encourages quick sketching and brainstorming. You can literally crumple up a bad idea and start fresh.
- Best for: Initial brainstorming, sketching out core screens, quick user flow mapping.
- Tip: Use a ruler for consistency, and different colored pens for emphasis.
-
Whiteboard and Markers:
- How it’s used: Draw larger screen layouts, user journeys, and interconnected ideas. You can easily erase and redraw. Take photos of different iterations.
- Why it’s great for low-fi: Excellent for collaborative brainstorming sessions. Allows for a bigger picture view and easy sharing of ideas in a group.
- Best for: Team ideation, mapping complex user flows, presenting ideas to a small group.
-
Sticky Notes / Index Cards:
- How it’s used: Each sticky note can represent a screen, a feature, or even an individual user action. Arrange them on a wall or table to visualize flows.
- Why it’s great for low-fi: Super flexible for rearranging and reordering. Great for creating "card sort" activities with potential users.
- Best for: User flow mapping, information architecture, feature prioritization.
B. Digital Tools for Low-Fidelity Prototyping
While these are digital, they offer features that make them ideal for quick, low-fidelity wireframing and prototyping.
-
Balsamiq Wireframes:
- What it is: A dedicated wireframing tool specifically designed to look like hand-drawn sketches. It intentionally lacks visual polish.
- How it’s used: Drag-and-drop pre-made components (buttons, text fields, images, etc.) that have a distinct "sketchy" style. You can link screens together to create clickable prototypes.
- Why it’s great for low-fi: Forces you to focus on structure and function. The visual style prevents stakeholders from getting distracted by colors or fonts. Very intuitive for beginners.
- Best for: Quickly creating digital wireframes that feel "unfinished" but clearly convey functionality.
-
Miro / Mural (Online Whiteboard Tools):
- What they are: Collaborative online whiteboards that allow multiple users to work together in real-time.
- How it’s used: Use shapes, sticky notes, text, and even import basic images to sketch out user flows, screens, and brainstorm ideas. You can create clickable areas to simulate navigation.
- Why it’s great for low-fi: Excellent for remote teams and collaborative brainstorming. Highly flexible, acting as a digital version of a physical whiteboard with added interactive features.
- Best for: Remote team collaboration, user journey mapping, digital sketching, integrating user feedback visually.
-
Figma / Sketch / Adobe XD (UI/UX Design Tools – Used for Low-Fi):
- What they are: Powerful vector-based design tools primarily used for high-fidelity UI/UX design.
- How they’re used for low-fi: Instead of using detailed graphics and colors, you intentionally keep your designs simple:
- Use basic shapes (rectangles, circles) for all elements.
- Stick to grayscale or black and white.
- Use simple, placeholder text (e.g., "Lorem Ipsum").
- Avoid detailed iconography or custom fonts.
- Focus on spacing, layout, and user flow.
- These tools also have prototyping modes to link screens together.
- Why they’re great for low-fi: Once you learn the basics, you can create consistent wireframes very quickly. The ability to create components and link screens makes digital prototyping efficient. Figma, in particular, is cloud-based and excellent for collaboration.
- Best for: Creating slightly more structured digital wireframes, especially if you plan to evolve them into high-fidelity designs later. Figma’s free tier is perfect for beginners.
-
Marvel / InVision (Prototyping & Collaboration Platforms):
- What they are: Tools designed to turn static design screens (even hand-drawn ones!) into interactive, clickable prototypes.
- How they’re used: You upload images of your sketches or wireframes, then define "hotspots" (clickable areas) that link to other screens. This simulates navigation.
- Why they’re great for low-fi: Excellent for bringing paper prototypes to life and making them testable. Allows users to "click through" your concept as if it were a real app. Marvel has a very beginner-friendly interface. (Note: InVision is phasing out its core product, but the concept of such tools remains relevant).
- Best for: User testing paper or simple digital wireframes, creating shareable interactive prototypes.
Best Practices for Low-Fidelity MVP Prototyping
Creating low-fi prototypes isn’t just about using the right tools; it’s about adopting the right mindset. Follow these best practices to maximize your success:
-
Embrace the "Rough" Look:
- Don’t try to make it pretty. The goal is to get feedback on functionality, not aesthetics. A rough look actually encourages more constructive criticism because users won’t feel like they’re "breaking" a finished product.
- Avoid colors, fancy fonts, or detailed graphics. Stick to basic shapes, lines, and text.
-
Focus on Core User Flows (Your MVP’s "North Star"):
- What’s the absolute minimum number of steps a user needs to take to achieve the core value proposition of your MVP? Design only for that path.
- Don’t get sidetracked by secondary features or edge cases. Your MVP is about solving ONE key problem well.
-
Keep it Simple & Minimal:
- Every screen, every element, should serve a clear purpose in demonstrating your MVP’s core functionality. If it doesn’t, remove it.
- Think about the "happy path" – the most common and ideal way a user will interact with your product.
-
Prototype, Don’t Build (Yet!):
- Resist the urge to write code or even fully design a UI. The entire point of low-fi is to avoid this investment until you’ve validated your idea.
- Your prototype is a communication tool, not a finished product.
-
Test Early and Often with Real Users:
- This is the most crucial step. Show your prototype to people who fit your target audience.
- Even just 3-5 users can reveal 80% of your major usability issues.
- Ask them to complete specific tasks and observe their behavior. Don’t lead them.
- Listen more than you talk. Let them voice their thoughts, confusion, and suggestions.
-
Embrace Feedback (Even the Negative):
- View negative feedback as a gift. It’s an opportunity to improve your product before it costs you significant time and money.
- Don’t get defensive. Remember, you’re testing the idea, not your artistic skills.
- Take detailed notes during user testing sessions.
-
Iterate, Iterate, Iterate:
- Based on the feedback you receive, refine your prototype. Make changes, then test again.
- This iterative loop of "build (low-fi) -> test -> learn -> iterate" is the core of agile and lean development.
- Don’t be afraid to scrap an idea or pivot if the feedback strongly suggests it.
-
Define Your MVP’s Success Metrics:
- Before you even start prototyping, what defines success for your MVP? Is it that users can complete a task in under 30 seconds? Is it a certain percentage of users saying they would use the product?
- Having clear metrics helps you objectively evaluate your prototype’s performance during testing.
-
Set Clear Expectations:
- When showing your low-fi prototype to others (users, stakeholders), make it clear that it’s a rough draft. Explain that you’re looking for feedback on functionality and flow, not visual appeal. This sets the right tone for constructive criticism.
The Low-Fi Prototyping Process: A Step-by-Step Guide for Beginners
Ready to roll up your sleeves? Here’s a simplified process to get your low-fidelity MVP prototype off the ground:
Step 1: Define Your Core Problem & MVP Solution
- What problem are you solving? Be specific.
- Who are you solving it for? (Your target users).
- What is the absolute minimum feature set (your MVP) that solves this problem for these users? Don’t add anything extra.
- Example: Problem: "People can’t easily find local dog walkers." MVP Solution: "A simple app where dog owners can post a request, and verified walkers can see and accept it."
Step 2: Sketch Out Your User Flow (The "Happy Path")
- How will a user achieve the core goal of your MVP? Map out each step.
- Tool: Whiteboard, sticky notes, or even just paper.
- Example (Dog Walker App): User opens app -> Lands on "Post Request" screen -> Fills out form -> Submits -> Sees "Request Sent" confirmation. (That’s one core flow).
Step 3: Create Your Low-Fidelity Screens (Wireframes)
- For each step in your user flow, sketch out a corresponding screen.
- Tool: Paper & pencil, Balsamiq, Figma (grayscale & basic shapes).
- What to include: Basic layout, placeholder text, simple buttons, input fields.
- What to avoid: Colors, fancy images, detailed icons, precise typography.
- Example (Dog Walker App):
- Screen 1: "Post a Dog Walking Request" (Title), "Dog Name" (input), "Date" (input), "Time" (input), "Location" (input), "Notes" (input), "Post Request" (button).
- Screen 2: "Request Sent!" (Text), "Confirmation" (icon/text), "View My Requests" (button).
Step 4: Make It Interactive (If Using Digital Tools)
- If you’re using tools like Figma, Balsamiq, Marvel, or InVision, link your screens together.
- Define "hotspots" (e.g., a "Post Request" button) that, when clicked, take the user to the next screen in your flow.
- If using paper, you can physically move paper screens, or have someone "pretend" to click as you swap screens.
Step 5: Conduct User Testing
- Find 3-5 people from your target audience.
- Give them a specific task (e.g., "Imagine you need a dog walker for next Tuesday. Use this app to post a request.").
- Observe them silently. Don’t interrupt or offer help unless they get completely stuck.
- Ask open-ended questions: "What were you thinking here?" "What did you expect to happen?" "Was anything confusing?"
- Take notes! Pay attention to where they hesitate, get confused, or make unexpected comments.
Step 6: Analyze Feedback & Iterate
- Review your notes from user testing. Look for patterns in the feedback.
- What were the most common points of confusion or difficulty?
- Prioritize the changes that will have the biggest impact on usability and your MVP’s core value.
- Go back to Step 3 or 4 and refine your prototype. Make the necessary changes.
- Repeat the testing process until your core flow is smooth and intuitive.
Conclusion: Your Gateway to Successful Product Development
Prototyping low-fidelity MVPs isn’t just a step in the design process; it’s a strategic approach that empowers you to innovate faster, smarter, and with significantly less risk. For beginners, it’s the perfect entry point into product development, teaching you invaluable lessons about user-centered design, iteration, and validation without requiring deep technical skills or large investments.
By embracing simple tools like paper and pen, or leveraging beginner-friendly digital platforms like Balsamiq or Figma (used minimally), you can quickly transform abstract ideas into testable concepts. Remember, the goal is not perfection, but clarity and functionality.
So, stop overthinking and start sketching! Your next great idea is just a low-fi prototype away from becoming a validated reality. The sooner you get your ideas in front of users, the sooner you’ll uncover what truly resonates and sets you on the path to building a product people will love.

Post Comment